Chilly Banana Oat Sandwich Bars: A Deliciously Healthy Treat
Introduction
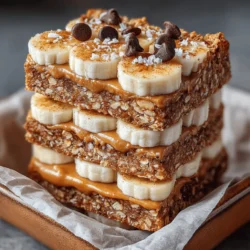
In the ever-evolving landscape of snack options, finding a balance between health and taste can feel like a daunting challenge. However, the Chilly Banana Oat Sandwich Bars emerge as a delightful solution that doesn’t compromise on either front. These bars harness the natural sweetness of ripe bananas and combine them with nutritious rolled oats, creamy nut butter, and optional dark chocolate chips, creating a versatile treat that can be enjoyed at any time of the day. Whether you need a quick breakfast, a midday energy boost, or a satisfying post-workout snack, these bars offer a deliciously healthy alternative that is simple to prepare and loaded with energy-boosting ingredients.
The beauty of Chilly Banana Oat Sandwich Bars lies in their adaptability. They are not only easy to make, but they also cater to various dietary preferences, making them accessible to everyone. In this article, we will delve into the recipe, exploring the health benefits of its key ingredients and providing practical tips for preparation and storage.
Understanding the Ingredients
The foundation of any great recipe lies in its ingredients. Here’s a closer look at what makes the Chilly Banana Oat Sandwich Bars so special.
The Power of Bananas
Bananas are more than just a convenient snack; they are nutritional powerhouses that offer an array of health benefits. Rich in essential vitamins and minerals, bananas provide a significant source of potassium, which is crucial for maintaining healthy blood pressure and supporting heart health. They are also a fantastic source of vitamin C, vitamin B6, and dietary fiber.
One of the standout features of bananas is their natural sweetness, which makes them an ideal ingredient for desserts and snacks. When using ripe bananas, you harness their maximum flavor potential. The sugars in ripe bananas break down into simpler sugars, providing a natural sweetness that enhances the taste of the sandwich bars without the need for excessive added sugars. When selecting bananas for this recipe, look for those that are speckled with brown spots, indicating peak ripeness that will yield the best flavor and texture in your bars.
Oats: A Nutritional Powerhouse
Oats are a staple in many healthy eating plans, and for good reason. Rolled oats are not only versatile but also packed with nutritional benefits that make them an essential ingredient in the Chilly Banana Oat Sandwich Bars. They are an excellent source of soluble fiber, which helps regulate digestion and can aid in lowering cholesterol levels. This fiber content also contributes to a feeling of fullness, making these bars a satisfying snack option.
In addition to their fiber content, oats are rich in complex carbohydrates, providing a steady release of energy. This makes them an excellent choice for those needing sustained energy throughout the day. The texture of rolled oats also plays a crucial role in the sandwich bars, giving them a hearty, chewy consistency that complements the creaminess of the nut butter and the sweetness of the bananas.
Nut Butters: Creamy and Nutritious
Nut butters are a delicious way to add creaminess and flavor to the Chilly Banana Oat Sandwich Bars. Options such as peanut butter, almond butter, and cashew butter not only enhance the taste but also contribute beneficial nutrients. Nut butters are high in healthy fats, proteins, and essential vitamins and minerals, making them an excellent addition to a balanced diet.
Peanut butter is particularly popular and provides a rich source of protein and healthy monounsaturated fats. Almond butter, on the other hand, is a good source of vitamin E and magnesium, while cashew butter offers a creamy texture with a slightly sweet taste. When choosing a nut butter for this recipe, consider your personal preferences and any dietary restrictions, as there are now many nut-free options available, such as sunflower seed butter.
Natural Sweeteners: Honey vs. Maple Syrup
While the ripe bananas provide a natural sweetness, adding a touch of sweetener can enhance the overall flavor profile of the sandwich bars. Both honey and maple syrup are excellent natural sweeteners that can be used in this recipe, each offering unique benefits.
Honey is known for its antibacterial properties and is often praised for its potential health benefits, including soothing sore throats and boosting energy levels. It has a distinct flavor that can vary based on the type of flowers from which the bees gather nectar, adding complexity to your bars. However, it is essential to note that honey is not suitable for vegans.
On the other hand, maple syrup is a plant-based sweetener derived from the sap of sugar maple trees. It contains antioxidants and minerals such as manganese and zinc. The flavor of maple syrup is slightly caramel-like, which can complement the other ingredients beautifully. When choosing between honey and maple syrup, consider your dietary preferences and the flavor profile you wish to achieve.
Exploring Flavor Enhancers
To take the Chilly Banana Oat Sandwich Bars to the next level, consider adding flavor enhancers such as vanilla extract and ground cinnamon. Vanilla extract introduces a warm, aromatic essence that pairs well with the sweetness of bananas and nut butter. Ground cinnamon, known for its anti-inflammatory properties, adds a hint of spice that can elevate the overall taste of the bars.
For those who enjoy a little indulgence, optional ingredients like dark chocolate chips or nuts and seeds can also be incorporated. Dark chocolate chips not only add a touch of sweetness but also provide antioxidants, while nuts and seeds contribute extra crunch and additional nutrients. These optional add-ins allow for customization based on personal preferences, making the bars even more enjoyable.
Step-by-Step Guide to Making Chilly Banana Oat Sandwich Bars
Creating these bars is a straightforward process, and with a few simple steps, you can have a batch ready to enjoy. Let’s break down the initial steps involved in preparing the banana mixture, which forms the heart of this delicious recipe.
1. Gather Your Ingredients: Before you begin, ensure you have all your ingredients on hand. You will need ripe bananas, rolled oats, your choice of nut butter, natural sweetener (honey or maple syrup), flavor enhancers (vanilla extract, ground cinnamon), and any optional add-ins like chocolate chips or nuts.
2. Prepare the Bananas: Start by peeling the ripe bananas and placing them in a large mixing bowl. Using a fork or a potato masher, mash the bananas until they reach a smooth consistency. It’s okay if there are a few small lumps, as this will add texture to the bars.
3. Combine the Ingredients: Once the bananas are mashed, add in the rolled oats and nut butter of your choice. If you’re using a natural sweetener, add that in as well. For flavor, incorporate a splash of vanilla extract and a sprinkle of ground cinnamon. Mix everything together until fully combined. The mixture should hold together well but still be slightly sticky.
4. Taste and Adjust: At this stage, taste the mixture and adjust the sweetness or flavorings as desired. If you prefer a sweeter bar, you can add a little more honey or maple syrup. If you’re using optional chocolate chips or nuts/seeds, fold them in at this point.
These initial steps set the stage for creating the Chilly Banana Oat Sandwich Bars. In the following sections of the article, we will continue with the preparation process, including how to shape and bake the bars, as well as tips for storage and serving. Stay tuned for the full guide to mastering this deliciously healthy treat!
{{image_2}}
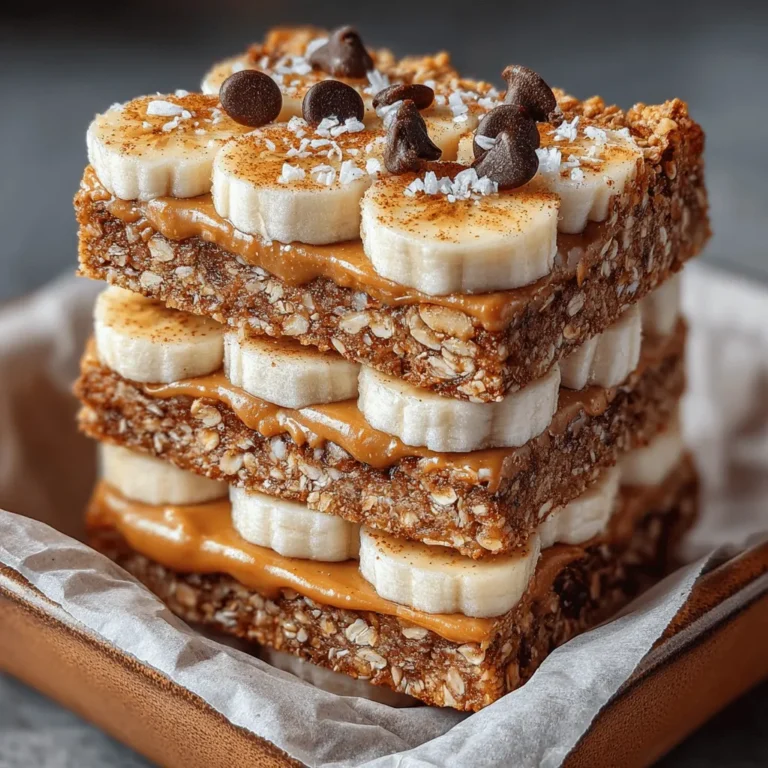
Detailed Instructions on Mashing Bananas
To achieve the perfect base for your Chilly Banana Oat Sandwich Bars, start with ripe bananas. The riper the bananas, the sweeter and more flavorful your bars will be. Begin by peeling the bananas and placing them in a mixing bowl. Use a fork or a potato masher to mash the bananas until they reach a smooth consistency. Aim for a few small lumps for added texture, as this will enhance the final product. This step is crucial because the bananas act as a natural sweetener and binder, ensuring your bars hold together beautifully.
Combining Ingredients for a Smooth Consistency
Once the bananas are mashed, it’s time to incorporate the other ingredients. In a separate mixing bowl, combine rolled oats, a pinch of salt, and any optional ingredients such as cinnamon or vanilla extract. Slowly add the dry mixture to the mashed bananas, stirring gently to avoid over-mixing. Use a spatula to fold the ingredients together until everything is evenly distributed. The goal is to create a smooth batter that holds together without being overly dense.
Tips for Achieving the Right Texture
The texture of your bars is essential for a delightful eating experience. To ensure the right consistency, consider the following tips:
– Use Overripe Bananas: They add natural sweetness and moisture, preventing the bars from being dry.
– Don’t Overmix: Stir just until combined. Overmixing can lead to tough bars.
– Adjust Liquid as Needed: If the mixture seems too dry, you can add a splash of almond milk or water to achieve the desired consistency.
Incorporating Oats and Optional Ingredients
The Importance of Gently Folding Oats into the Mixture
When it comes to adding oats to your banana mixture, gentle folding is key. This technique ensures that the oats are evenly distributed without breaking them down. Begin by sprinkling the oats evenly over the banana mixture. Use a spatula to fold them in slowly, working from the bottom of the bowl to the top. This method helps maintain the integrity of the oats, which provide texture and fiber to your sandwich bars.
When and How to Add Chocolate Chips or Nuts/Seeds
If you’re opting to include chocolate chips, nuts, or seeds, now is the time to add them. For a chocolatey flavor, use semi-sweet or dark chocolate chips; for a nutty crunch, consider walnuts or almonds. Fold these ingredients into the mixture after the oats have been incorporated. Aim for an even distribution, ensuring that every bite has a bit of chocolate or nutty goodness.
Lining the Baking Dish Effectively
Choosing the Right Dish Size
Selecting the proper baking dish is crucial for the success of your sandwich bars. A 9×9 inch square baking dish works well for this recipe, providing the right depth and surface area for even cooking. If you prefer thinner bars, a larger dish like a 9×13 inch pan can be used, but keep an eye on the baking time, as they may cook faster.
Techniques for Lining with Parchment Paper for Easy Removal
To ensure easy removal of the bars after baking, line your baking dish with parchment paper. Cut a piece of parchment paper to fit the bottom of the dish, allowing the edges to overhang slightly. This overhang will serve as handles to lift the bars out once they’ve cooled. Grease the parchment lightly with non-stick spray or a small amount of coconut oil to prevent sticking.
Layering the Sandwich Bars
Step-by-Step Instructions on Creating Layers
Now that your baking dish is ready, it’s time to layer your sandwich bars. Start by pouring half of the banana-oat mixture into the lined dish. Use a spatula to spread it evenly across the bottom, pressing down gently to create a compact base. This step is essential for ensuring that your bars hold together once baked.
Next, if desired, you can add a layer of nut butter or fruit preserves over the base layer. Spread it evenly, taking care not to disturb the base. Finally, top with the remaining banana-oat mixture, spreading it out evenly and pressing down gently again. This layering technique ensures that you have a delicious sandwich bar that is packed with flavor and texture.
How to Press the Mixture for a Compact Base and Top Layer
For a perfect balance and to avoid crumble, press the mixture firmly but gently. Use the back of a flat spatula or your hands (lightly oiled if needed) to compress the mixture down. This compactness helps the bars retain their shape during baking and makes them easier to cut after cooling.
Freezing to Perfection
The Importance of Freezing Time for Texture
Once your sandwich bars are layered and ready, it’s time to freeze them. Freezing is crucial as it helps the bars set properly, giving them a firm texture that holds up when cut. Allow the bars to freeze for at least 2 hours or until they are completely solid. This ensures they cut neatly without crumbling.
Tips for Covering the Dish Properly
To prevent freezer burn and maintain flavor, cover the baking dish tightly with plastic wrap or aluminum foil before placing it in the freezer. If you plan to freeze the bars for an extended period, consider transferring them to an airtight container after they have set. This additional layer of protection helps keep your bars fresh for weeks.
Cutting and Serving the Bars
Best Practices for Lifting and Cutting the Bars
Once the bars are fully frozen, it’s time to cut and serve them. Start by lifting the bars out of the dish using the parchment paper overhang. Place them on a cutting board and use a sharp knife to cut them into squares or rectangles, depending on your preference. For clean cuts, run the knife under hot water and wipe it dry between cuts.
Recommendations for Serving and Presentation
These sandwich bars are versatile and can be served in various ways. For a simple presentation, stack them on a plate and dust with a light sprinkle of powdered sugar or a drizzle of honey. They can be enjoyed as is or served with a dollop of yogurt or nut butter for added flavor and nutrition. These bars are perfect for breakfast, snacks, or even a light dessert.
Storage Solutions for Leftover Bars
How to Store Bars in an Airtight Container
If you have leftover bars, store them in an airtight container to keep them fresh. Layer parchment paper between the bars to prevent them from sticking together. Properly stored, these bars can last up to a week at room temperature, or longer in the refrigerator.
Best Practices for Freezing and Thawing
To freeze individual bars, wrap each one in plastic wrap and place them in a freezer-safe bag or container. This way, you can grab a bar whenever you need a healthy snack. When you’re ready to enjoy, simply remove a bar from the freezer and allow it to thaw at room temperature for about 15-20 minutes. For a quick treat, you can also pop them in the microwave for a few seconds.
Nutritional Information
Understanding the nutritional value of these sandwich bars can enhance appreciation for this delicious snack.
Caloric Content and Nutritional Breakdown
Each bar contains approximately 150 calories, making them a great option for a healthy snack or breakfast. The nutritional breakdown per serving is as follows:
– Carbohydrates: 25g
– Protein: 3g
– Fat: 4g
Health Benefits Associated with Each Ingredient
– Bananas: Rich in potassium and vitamin C, bananas provide energy and support heart health.
– Oats: A great source of fiber, oats can help lower cholesterol and keep you feeling full longer.
– Nuts/Seeds: If included, these add healthy fats and protein, enhancing the overall nutritional profile of the bars.
Conclusion
Chilly Banana Oat Sandwich Bars are more than just a tasty treat; they are a nutritious option that fits seamlessly into a healthy lifestyle. With simple ingredients and an easy preparation process, these bars can be made in advance, offering a convenient and satisfying snack for any time of the day. By understanding the benefits of each ingredient and following the step-by-step instructions, anyone can enjoy this delightful blend of flavors and textures. Whether you are looking for a quick breakfast, an afternoon pick-me-up, or a post-exercise treat, these sandwich bars are sure to please your taste buds and nourish your body.