Introduction
Mini Chicken Taco Biscuit Cups are an exciting culinary creation that marries the hearty comfort of biscuit dough with the bold, zesty flavors typically found in tacos. These bite-sized treats are perfect for a variety of occasions, whether you’re hosting a casual get-together, planning for game day, or simply looking for a fun and quick family meal. Their versatility and ease of preparation make them a favorite among home cooks and food enthusiasts alike. This article will walk you through the process of making these delicious cups, sharing insights on the key ingredients, variations, and serving suggestions that can enhance your culinary experience.
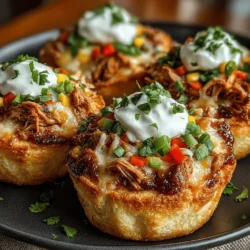
The concept of Mini Chicken Taco Biscuit Cups is rooted in the desire to transform traditional taco flavors into a format that is both approachable and shareable. By using refrigerated biscuit dough as the base, these cups capture the flaky texture and buttery flavor of classic biscuits while serving as the perfect vessel for a savory, seasoned chicken filling. Topped with cheese, colorful peppers, and fresh garnishes, these cups not only look appealing but also offer a satisfying crunch with every bite.
Understanding the Ingredients
The Base: Biscuit Dough
At the heart of Mini Chicken Taco Biscuit Cups is the biscuit dough, which provides a light and flaky foundation for the filling. Refrigerated biscuit dough is an ideal choice for this recipe due to its convenience and consistent results. It allows you to create delicious cups without the hassle of making dough from scratch. For the best results, consider using a flaky buttermilk variety, which adds a rich flavor and a tender texture that complements the savory filling beautifully.
The advantage of using refrigerated biscuit dough lies in its quick preparation time. In just a few minutes, you can have your cups ready to bake, making it a fantastic option for busy weeknights or spontaneous gatherings. The dough is easy to work with and can be shaped to fit perfectly into a muffin tin, ensuring that each cup turns out uniform in size and shape.
The Filling: Chicken and Seasoning
The filling for these Mini Chicken Taco Biscuit Cups is where the flavor truly shines. Using cooked, shredded chicken as the main ingredient not only adds protein but also allows you to infuse the cups with a variety of seasonings and sauces. A great option is to utilize rotisserie chicken, which is both convenient and packed with flavor. The convenience of rotisserie chicken means you can save time while still achieving a delicious result.
When it comes to seasoning, taco seasoning is a must. This spice blend typically includes cumin, chili powder, garlic powder, and paprika, among other spices, which together create the signature taco flavor. It’s important to consider your spice tolerance when choosing the amount of seasoning to use; you can easily adjust the quantity depending on your preference. Additionally, incorporating salsa into the filling not only enhances the flavor but also adds moisture, ensuring that your cups remain juicy and flavorful.
The Toppings: Cheese, Peppers, and More
No taco is complete without toppings, and these Mini Chicken Taco Biscuit Cups are no exception. The choice of cheese plays a crucial role in the overall flavor and texture of the dish. Cheddar cheese is a classic option, offering a sharp and tangy taste that pairs well with the other ingredients. Alternatively, a Mexican cheese blend can provide a more complex flavor profile with its combination of cheeses like Monterey Jack and Queso Blanco.
Bell peppers are another essential element, adding a pop of color and crunch to each cup. Their mild sweetness complements the savory chicken filling and taco seasoning beautifully. For an extra burst of flavor and a touch of freshness, consider garnishing your cups with sliced green onions. These not only enhance the visual appeal but also add a mild onion flavor that balances the richness of the cheese.
Step-by-Step Instructions for Preparation
Prepping the Oven and Muffin Tin
Before diving into creating your Mini Chicken Taco Biscuit Cups, it’s essential to prepare your kitchen space. Start by preheating your oven to 375°F (190°C). This temperature is ideal for baking the biscuit dough to a golden brown while ensuring that the filling is heated through.
While the oven is preheating, turn your attention to the muffin tin. Properly greasing the muffin tin is crucial to ensure that your biscuit cups release easily after baking. You can use cooking spray, butter, or oil to coat each muffin cup thoroughly. This step will save you from the frustration of having your delicious creations stick to the pan and will help maintain their shape.
Creating the Biscuit Cups
With the oven preheated and the muffin tin greased, it’s time to create the biscuit cups. Begin by separating the refrigerated biscuit dough into individual pieces according to the package instructions. To shape the dough into cups, take each piece and gently flatten it with your fingers or a rolling pin. Aim for an even thickness, as this will ensure that the cups bake uniformly and have a pleasing texture.
Once flattened, carefully fit each piece of dough into the greased muffin tin, pressing it into the bottom and up the sides to form a cup shape. Make sure to leave enough room for the filling, but don’t worry about achieving a perfect shape; the rustic look adds to their charm.
Mixing the Filling
Now that the biscuit cups are formed, it’s time to prepare the filling. In a mixing bowl, combine the cooked, shredded chicken with taco seasoning and salsa. The salsa will add moisture and flavor, helping to bind the ingredients together. Stir the mixture until everything is well combined and the chicken is evenly coated with the seasoning and salsa.
This step is where you can get creative; feel free to adjust the seasoning based on your taste preferences or add additional ingredients like black beans or corn for extra texture and flavor. Once your filling is well mixed, it will be ready to spoon into the prepared biscuit cups, setting the stage for a delicious and satisfying snack.
As you embark on this culinary adventure, remember that the beauty of Mini Chicken Taco Biscuit Cups lies not only in their flavor but also in their adaptability. Customize the fillings and toppings to suit your taste, and enjoy the process of creating these delightful treats. Keep following along as we dive deeper into the baking and serving techniques to make your Mini Chicken Taco Biscuit Cups a hit!
{{image_2}}
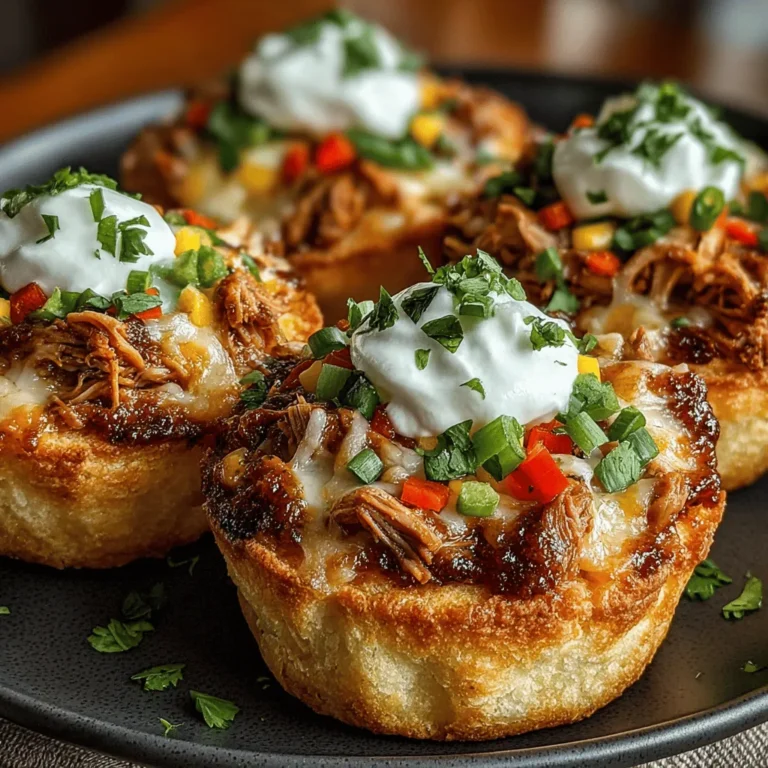
Creating Mini Chicken Taco Biscuit Cups is a delightful culinary adventure, and now it’s time to focus on assembling, baking, and serving these delicious bites. In this section, we’ll explore how to customize the filling, perfect the baking process, and present your taco cups in a way that will impress any crowd.
Suggestions for Customizing the Filling with Additional Ingredients
The filling of your Mini Chicken Taco Biscuit Cups can be easily customized to cater to various taste preferences and dietary needs. Here are a few suggestions to elevate your filling:
– Black Beans: Add a can of drained and rinsed black beans for additional protein and fiber. This not only enhances the nutritional value but also provides a rich, earthy flavor that complements the chicken.
– Corn: Incorporate sweet corn for a burst of color and sweetness. Fresh, frozen, or canned corn can work well; just ensure it’s drained if using canned.
– Bell Peppers: Diced bell peppers can add a crunchy texture and a pop of color. You can sauté them along with the chicken for a more blended flavor.
– Jalapeños: For those who enjoy a kick, finely chopped jalapeños can spice things up. Consider removing the seeds for a milder heat.
– Avocado: Diced avocado added after baking can lend a creamy texture to each bite, making the cups even more enjoyable.
– Cheese Varieties: Experiment with different types of cheese such as pepper jack for a spicy twist or a blend of cheddar and Monterey Jack for a creamy texture.
Filling and Baking the Cups
Assembly of the Mini Taco Cups
Once your filling is ready, it’s time to assemble the mini taco cups. Here are some techniques for spooning the filling into the biscuit cups:
1. Preheat the Oven: Start by preheating your oven to 375°F (190°C) to ensure it’s hot enough when you’re ready to bake.
2. Prepare the Biscuit Dough: Open your biscuit dough and separate it into individual pieces. Flatten each biscuit into a circle, about 3 inches in diameter. This will help it fit snugly into the muffin tin.
3. Spoon the Filling: Using a tablespoon, carefully spoon the filling into the center of each biscuit. Aim for about 2 tablespoons of filling per cup. This allows enough room for the filling to expand while baking.
4. Cheese Distribution: After filling the cups, sprinkle shredded cheese on top. To ensure even melting, distribute the cheese evenly across all cups. This will create a deliciously gooey topping that binds the flavors together.
Baking Process
Baking your Mini Chicken Taco Biscuit Cups is a crucial step to achieving the perfect texture and flavor. Here are guidelines for optimal results:
– Baking Time and Temperature: Bake the filled biscuit cups in the preheated oven for approximately 15-20 minutes. Keep an eye on them as baking times may vary slightly based on your oven.
– Signs of Doneness: The cups are ready when the biscuits are golden brown, and the cheese is bubbling and slightly browned. This visual cue indicates that the biscuit is fully cooked and the filling is heated through.
Cooling and Serving
Cooling Tips
Once your Mini Chicken Taco Biscuit Cups are out of the oven, allow them to cool slightly before removing them from the muffin tin. Here’s why and how to do it safely:
– Importance of Cooling: Letting the cups cool for about 5 minutes allows the biscuit to firm up a bit, making them easier to handle.
– Safe Extraction: Use a butter knife to gently pry around the edges of each cup. This will help release the biscuit from the sides of the muffin tin without damaging it. Carefully lift each cup out and let them cool on a wire rack for a few more minutes.
Serving Suggestions
These mini taco cups are perfect for a variety of occasions. Here are some ideas for serving them:
– Appetizers: Serve mini taco cups at parties or gatherings as an easy-to-eat appetizer. Arrange them on a platter with toothpicks for easy serving.
– Game Day Snacks: They make for a fun and interactive snack during game day. Pair with salsa, guacamole, or queso for a complete spread.
– Family Meals: These cups can also serve as a quick and delicious weeknight meal. Pair with a side salad for a balanced dinner.
– Toppings: Enhance the flavor by offering a variety of toppings such as sour cream, fresh cilantro, diced tomatoes, avocado slices, or sliced olives. Set up a taco bar where guests can customize their cups to their liking.
Variations to Try
To keep things fresh and exciting, consider these variations:
Different Protein Options
While this recipe centers around chicken, you can switch things up:
– Ground Beef or Turkey: Swap the chicken for ground beef or turkey for a different taste. Sauté with taco seasoning for a classic taco flavor.
– Vegetarian Options: For a meatless version, consider using a combination of mushrooms and lentils or chickpeas for a hearty filling.
Flavor Enhancements
If you want to amp up the flavor profile, try these suggestions:
– Spices: Add extra spices such as cumin, paprika, or chili powder to the filling for added depth. A dash of hot sauce can also bring a delightful kick.
– Sauces: Incorporate a bit of salsa or taco sauce into the filling for added moisture and flavor. This will also help meld the ingredients together.
Dietary Considerations
For those with specific dietary needs, here are some tips:
– Gluten-Free Version: Use gluten-free biscuit dough available at most grocery stores. Make sure to check the labels to ensure they are truly gluten-free.
– Dairy-Free Option: Substitute regular cheese with dairy-free cheese alternatives, and use plant-based milk in the biscuit dough if needed.
Conclusion
Mini Chicken Taco Biscuit Cups are a versatile and crowd-pleasing option that can be tailored to suit any gathering or personal taste preference. With simple ingredients and straightforward instructions, these delightful bites are sure to impress your guests and satisfy your cravings. Whether you serve them as an appetizer, snack, or quick meal, their deliciousness is sure to make them a favorite in your recipe rotation. Enjoy the process of creating and sharing these flavorful treats!